HiStruct Roofs: How to Save Material with a Smartly Designed Roof
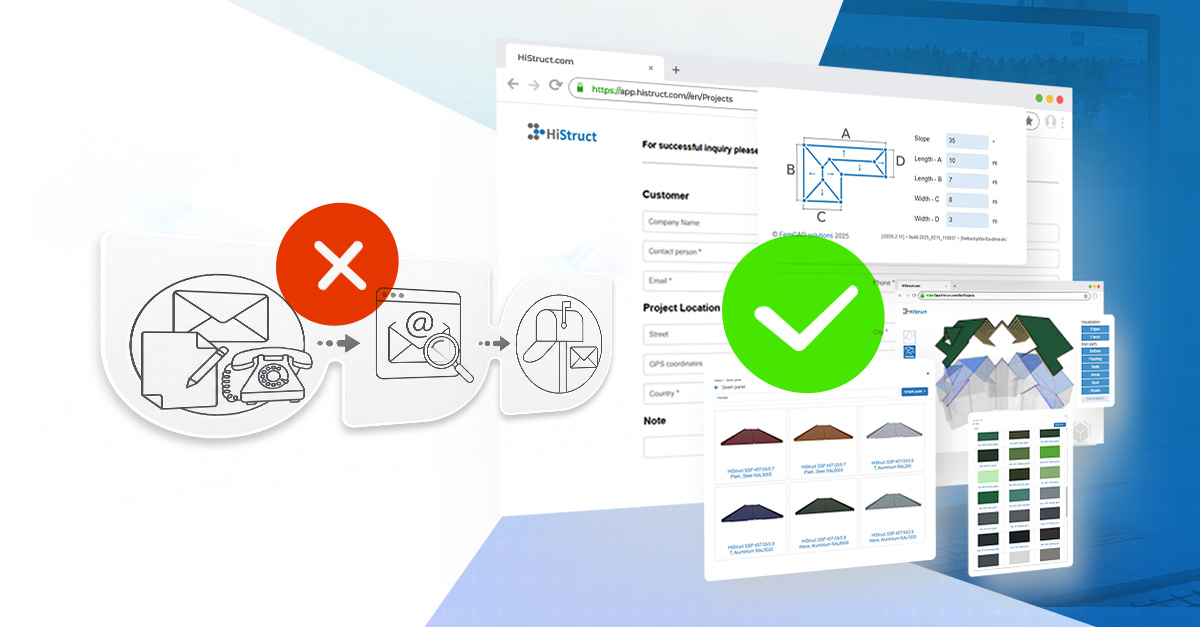
The installation drawing for the roof plane translates the technical project documentation into a practical guide for construction. It defines the exact placement of roofing sheets, joints, and structural details. A well-designed layout helps minimize offcuts and makes the most of your roofing material. But finding the right balance between technical demands, accuracy, and material efficiency can be challenging — unless you’re using the HiStruct Roofs 3D roof configurator. Let’s take a closer look at how it works.
Efficiency First
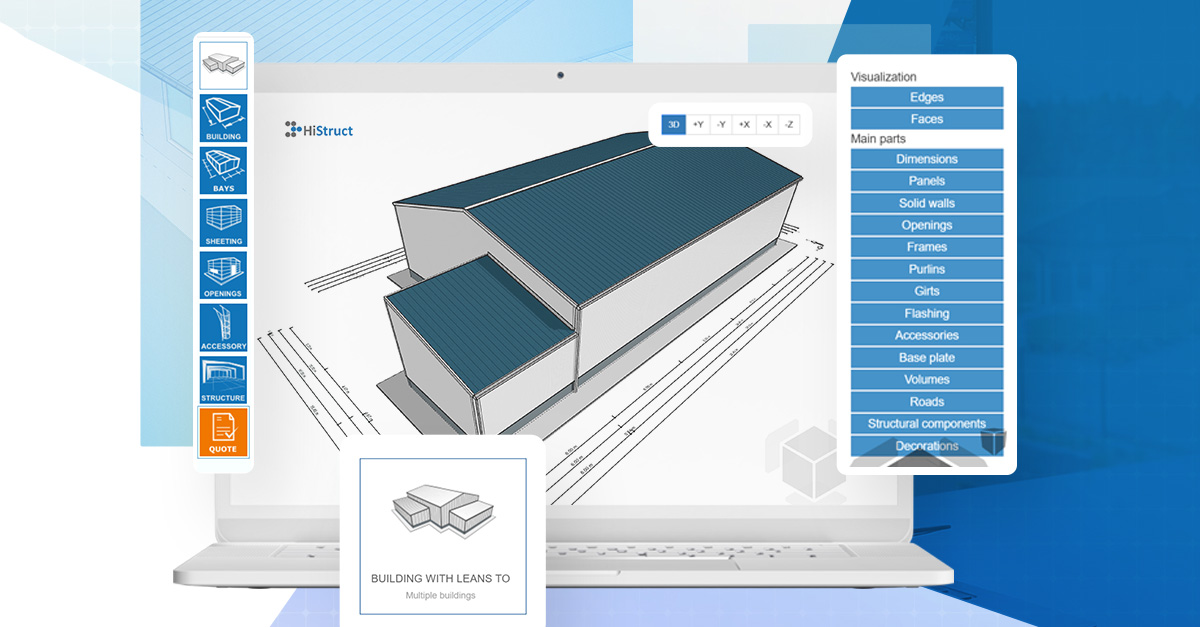
The HiStruct Roofs 3D roof configurator automatically generates an installation drawing for the selected roof surface and suggests an arrangement that minimizes waste. No manual recalculations are needed — the system helps identify the most efficient combinations for you. You can quickly compare different options and choose the one that best fits your technical, aesthetic, and budget requirements.
How to Adjust Roof Installation Drawings in HiStruct
Working with roof installation drawings in HiStruct roofing software is simple. Start by selecting the roof surface you want to edit. Every adjustment instantly updates the material-use indicator, which compares the clean roof area with the area of the tiles or sheets actually required. This lets you immediately see which option is most efficient.
Try it with our step-by-step guide
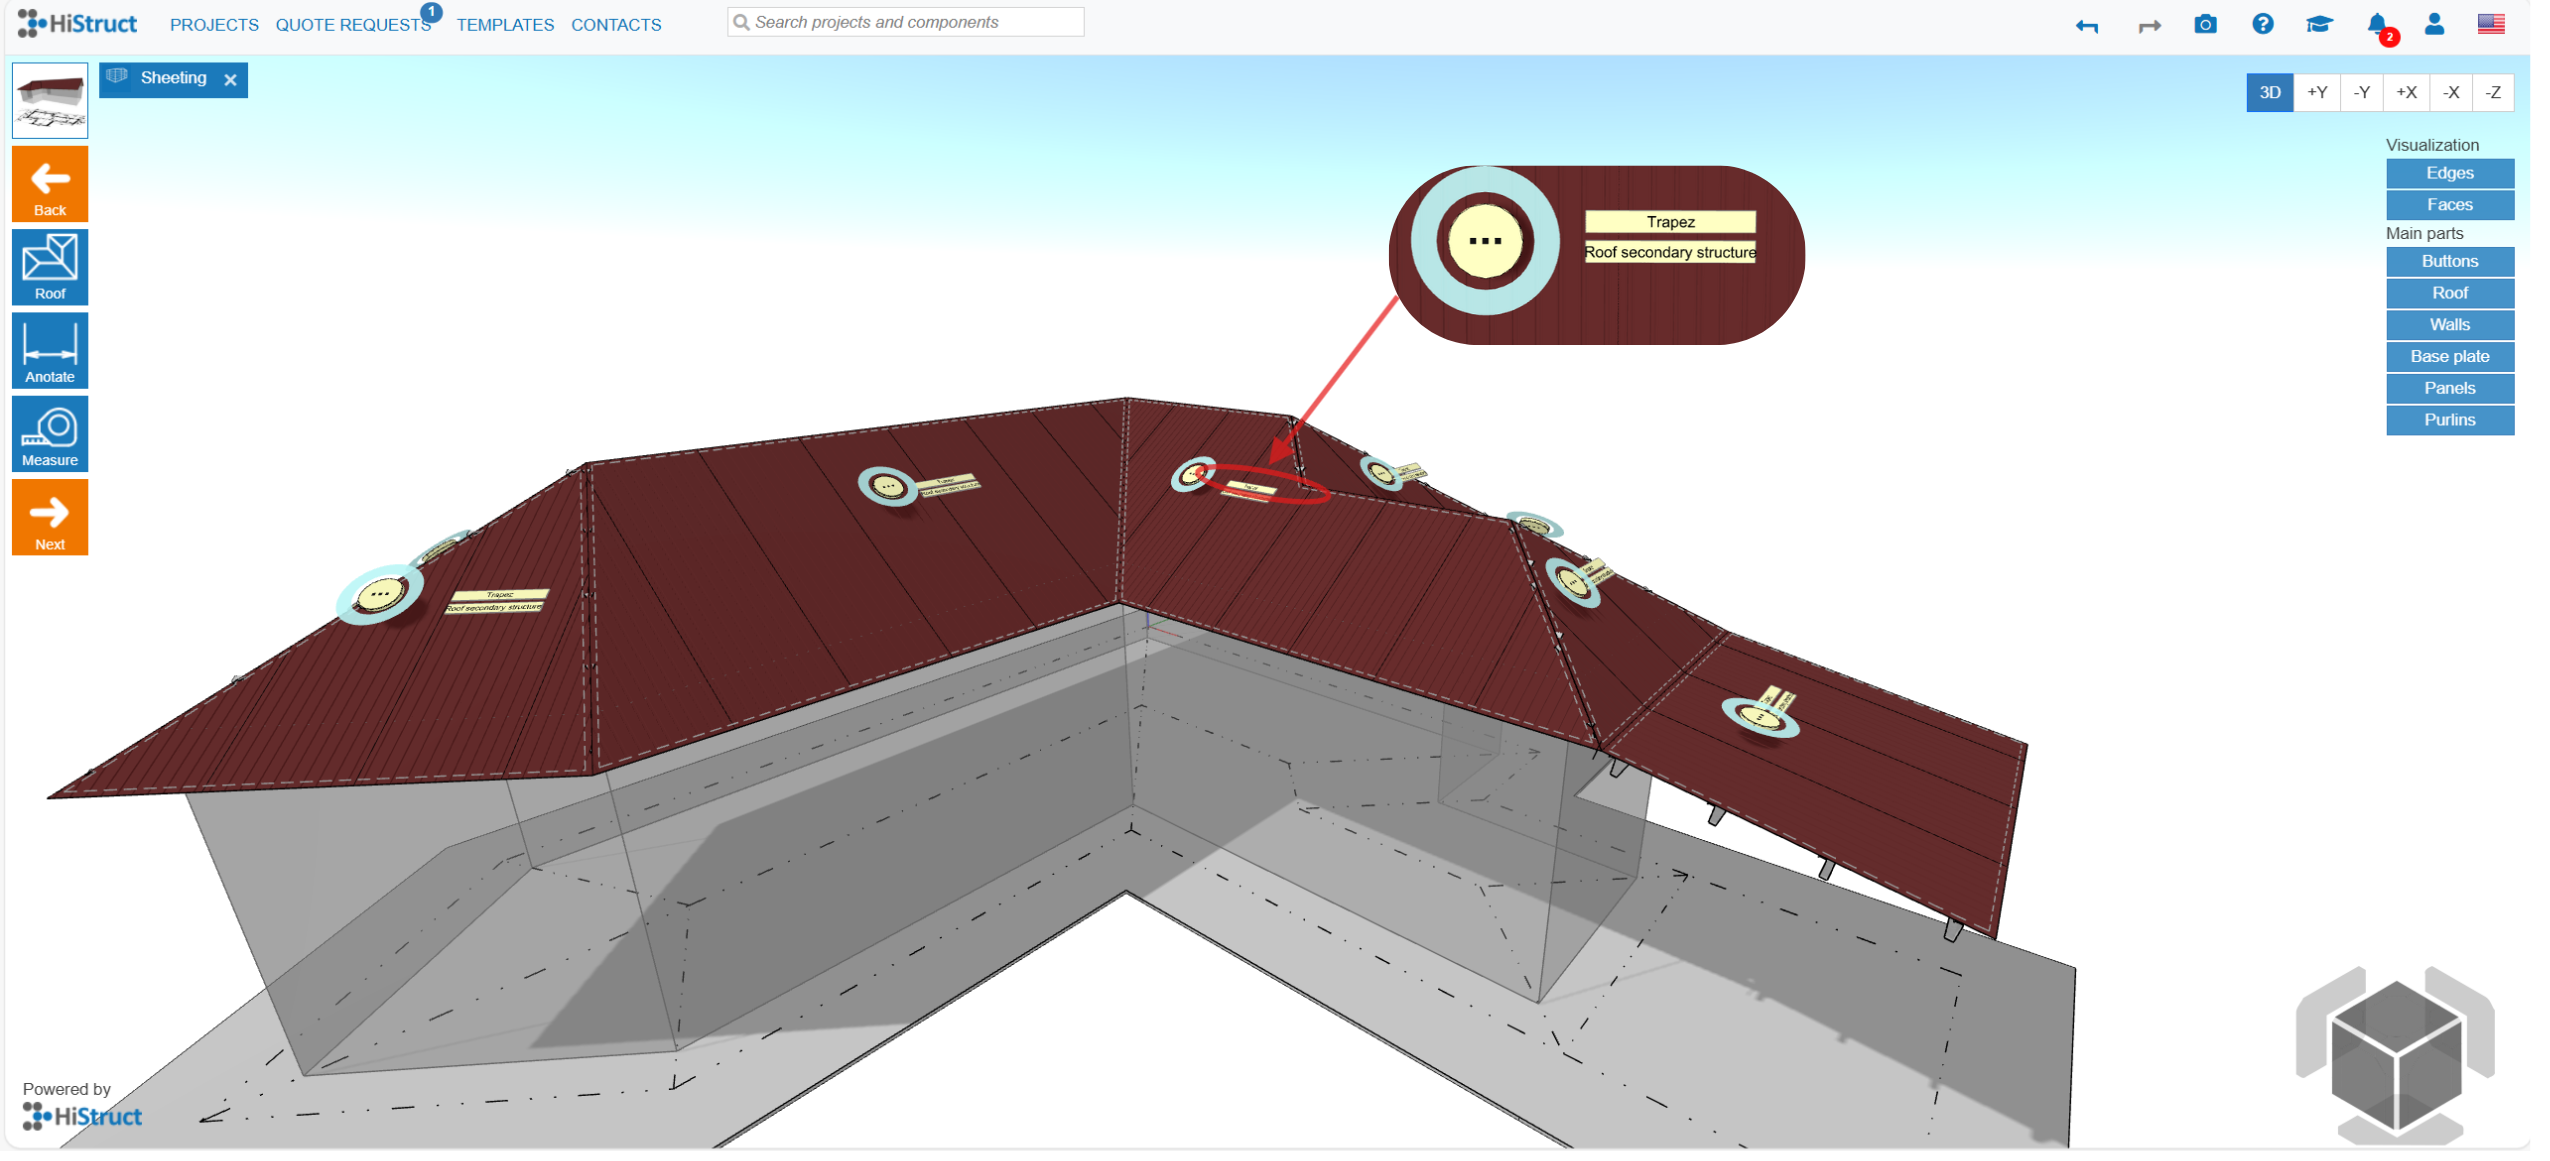
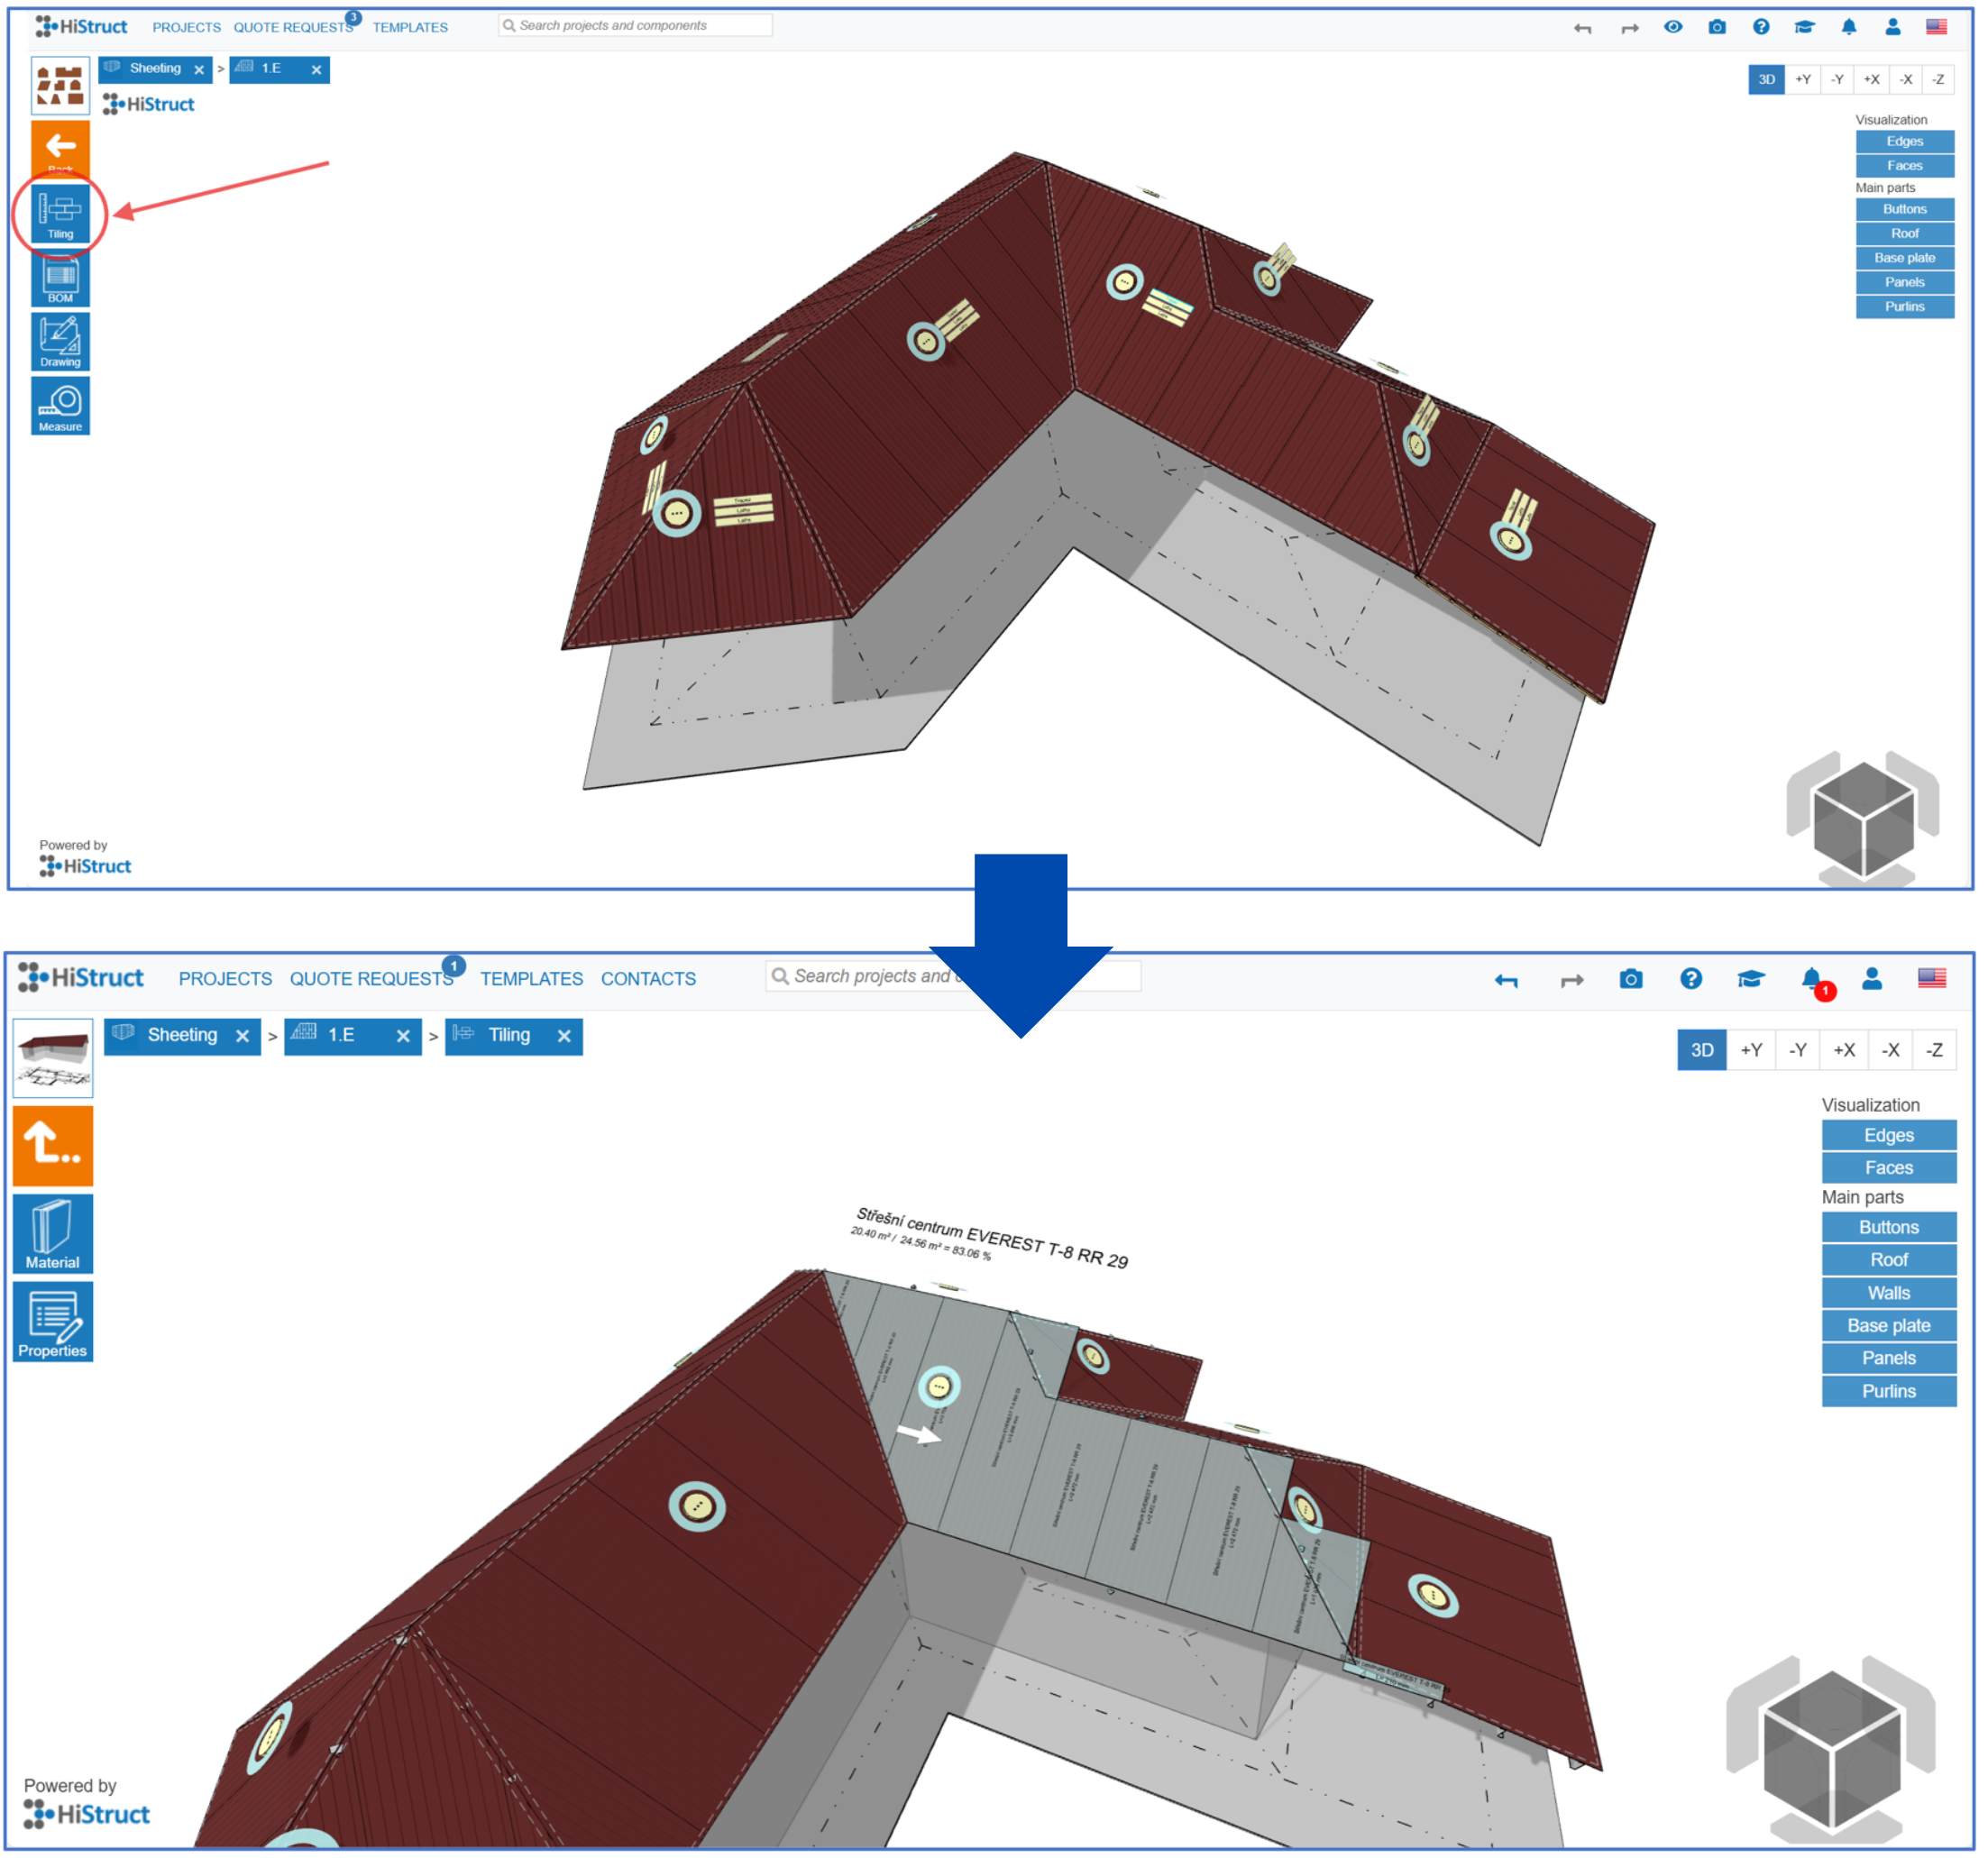
1. Select the Sheeting tab ⮕ and click the Edit button on the layer you want to display. In our example, it’s Trapez.
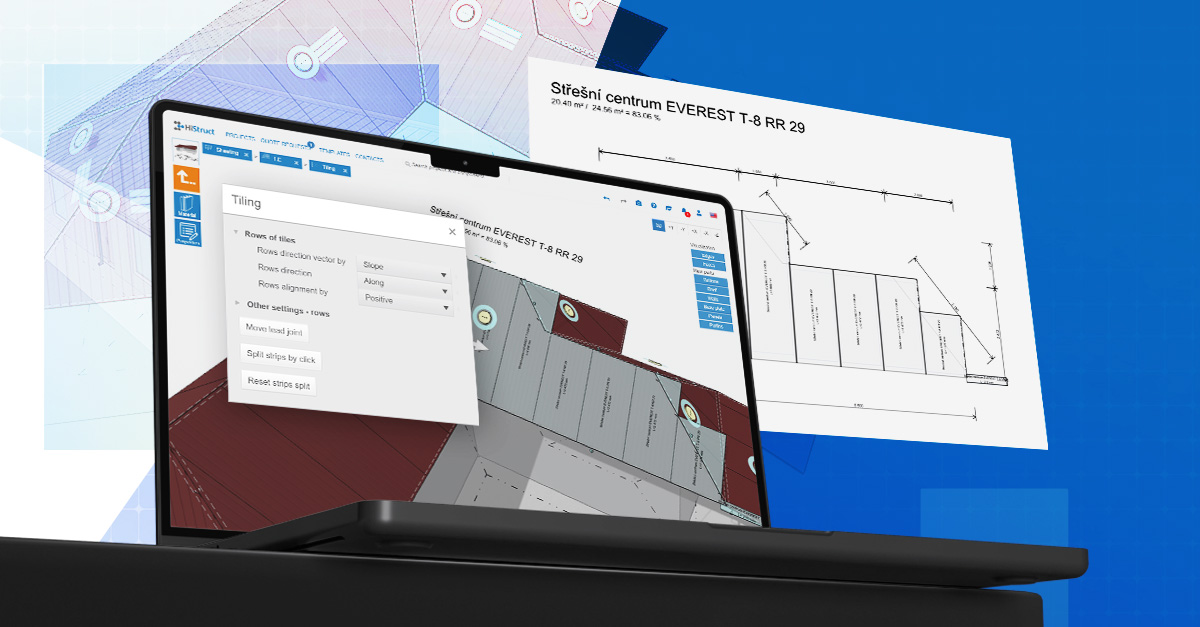
2. Click the Tiling tab to display the proposed roof-sheet layout along with the percentage of material utilization. You can continue adjusting the layout — edit individual sections or change the entire arrangement. For example, you can modify the starting point and direction of installation, adjust row alignment, or break the sheet strips wherever necessary.
3. To view the finished plan, click the Drawing tab, where you can make further adjustments. Add dimensions, insert labels, or name individual plans. Additional dimensions can be added the same way, including changes to their placement and orientation.
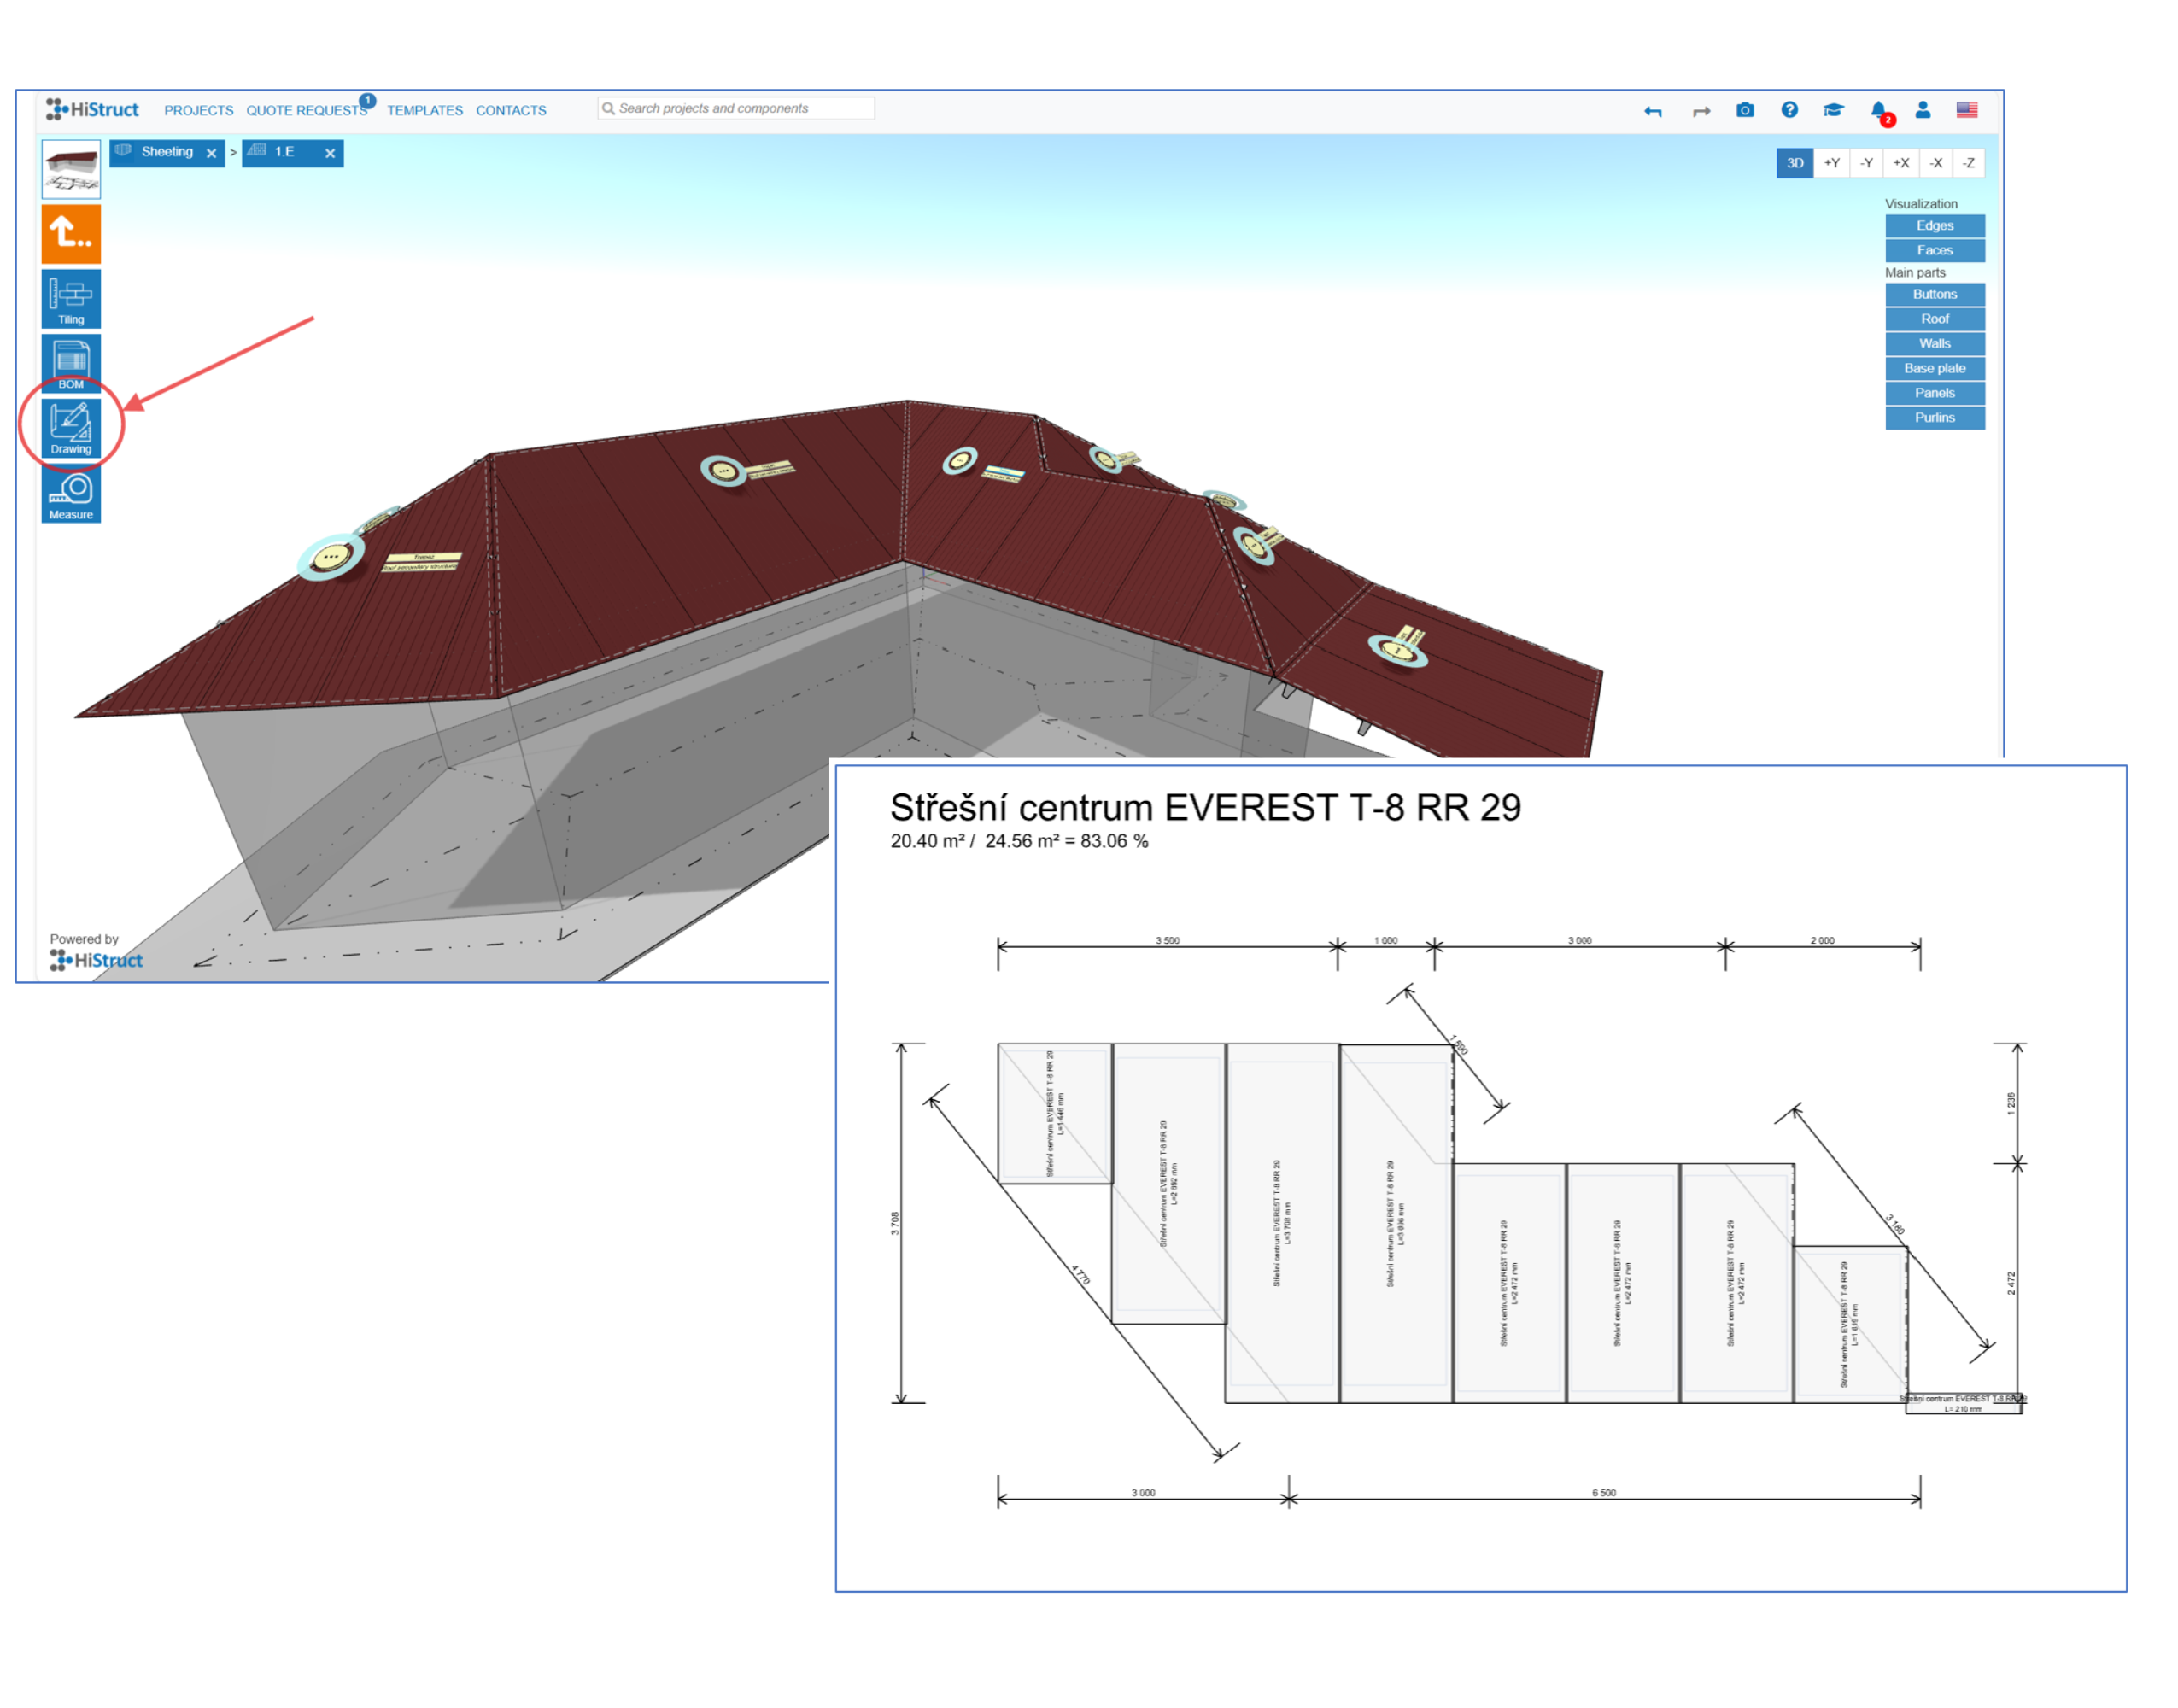
4. Once your drawing is complete, it is automatically included in the final outputs. You’ll find them in the main menu on the left under the Drawings tab.
In HiStruct, a roof installation drawing isn’t just a mandatory part of the documentation — it’s a practical working tool that gives you a clear overview of material requirements and the final design. Thanks to instant feedback, you can easily identify the most technically sound and cost-efficient solution.
💡 Want to learn more about HiStruct 3D configurators? Check out our other applications:
💡 Have a unique product and need a custom configurator?
- Explore our Custom Development options